Talon Advanced Registration Documentation
What is Advanced Registration for new customer accounts?
Advanced Registration for new customer accounts is built specifically to work with Shopify's new customer accounts system. It lets you collect custom information from customers, require approval before they can purchase, and lock your store or checkout for unapproved customers.
If your store still uses legacy customer accounts, use the Advanced Registration documentation for legacy customer accounts.
Why do customers have to log in through Shopify?
With new customer accounts, Shopify controls the login process entirely. Customers log in using their email and a one-time code, without passwords.
No app can change, bypass, or customize this. It is how Shopify's new customer accounts work.
Can I customize Shopify's login page?
No. The login page belongs to Shopify and is hosted on Shopify's servers. You cannot change the text, design, add your logo, remove elements, or add fields.

Where is my registration form?
Your form is at https://[your-store].com/apps/advanced-registration.
You can link to this from anywhere: your navigation menu, buttons,
banners, or anywhere else on your site.
Why can customers log in without my approval?
With Shopify's new customer accounts, anyone can log in using just their email and a one-time code. Shopify controls this, and no app can prevent it.
Logging in does not mean the customer has access. With locks enabled, customers can log in but cannot purchase or access locked content until you approve them.
What lock options are available?
-
Lock storefront - unapproved customers cannot see the content until approved.
-
Lock checkout - customers can browse but cannot purchase until approved.
-
Lock specific pages - only certain pages require approval.
How do I set it up so customers can browse but not purchase?
Go to Configuration > Locks.
Choose Lock checkout, not Lock storefront.
Customers can browse freely, but purchasing is blocked until you approve them.
How do I hide prices and show them only to approved customers?
If your goal is to let visitors browse your products without seeing prices, pair Advanced Registration with Talon Login to View Price. The two apps handle different parts of the workflow and are often used together for B2B and wholesale stores:
-
Advanced Registration controls the approval process (form, pending, approve/reject).
-
Login to View Price hides prices and add-to-cart buttons from guests and unapproved visitors.
With Login to View Price, your product pages stay public and crawlable by search engines, but prices and buy buttons are hidden until customers are approved.
How to set them up together
-
In Advanced Registration, configure your approval process (form fields, approval rules, etc.).
-
When you approve a customer, the app adds a tag (for example
advanced-registration:approved). -
In Login to View Price, set prices to show only to customers carrying that same tag.
-
Guests can browse, and only approved customers see prices and can purchase.
I'm using the original Advanced Registration app. Do I need to migrate?
If your store is using new customer accounts, yes. The original version does not work with new customer accounts.
If your store is still on legacy customer accounts, you can keep using the old version for now, but Shopify is phasing legacy customer accounts out eventually.
What's the difference between the old and new flow?
Old flow (legacy customer accounts):
Registration form -> Pending -> Approved -> Customer can shop
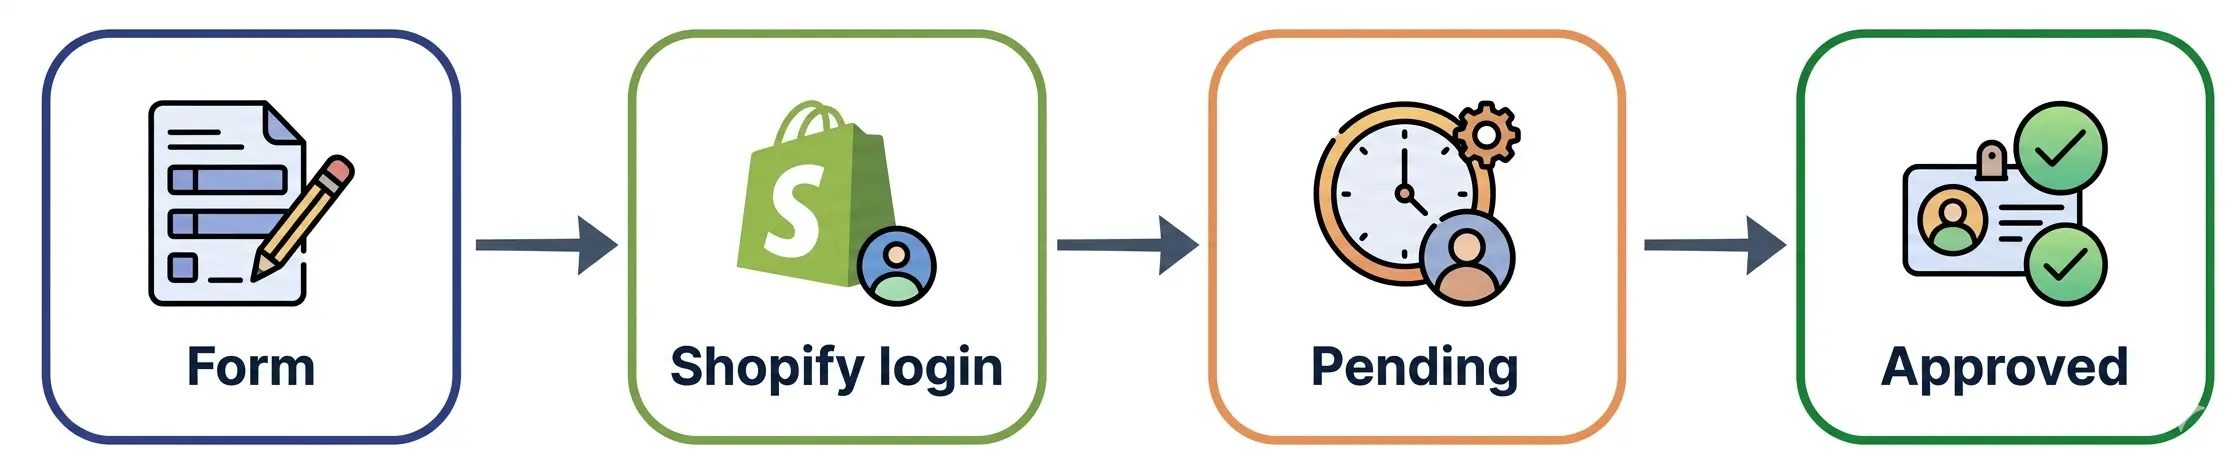
New flow (new customer accounts):
Registration form -> Shopify login -> Pending -> Approved -> Customer can shop
The main difference is that Shopify now handles account creation. The app collects your custom information, but Shopify creates the actual customer account.
Need additional help? Have a question? Write to us at [email protected]